Folding Diagrams for the Cherry Blossom
p. 3 of 4 (Steps 21-27)


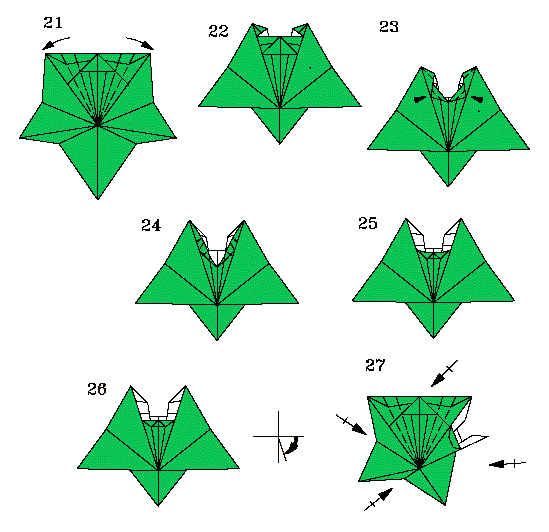
Diagrams for steps 21-27.
  1. Bisect the sides.
    Note that the center points upward.
    Make two crimps on existing creases.
  2. Pull the flap down, again using existing creases.
  3. "Pop" the sides of the temporary structure formed in step 22.
    The creases lie on existing mountain folds, and line up with the paper edges.
  4. Flatten the white layers, so that the cut edges line up with the main 72 degree angles of the pentagon. The tip (where the white layers meet) will open out.
  5. Flatten the tip.
  6. The finished sink. Rotate 72 degrees.
  7. Repeat steps 21-26 on the remaining four sides.

Navigational Assistance:


[ Home page | Origami Menagerie | Instructions | Comments | Steps 10-20 | Steps 28-35 ]

Format Copyright 1996-99, 2002; model copyright 1996-97 by
Jasper (aka John Paulsen). Your comments are welcomed.
Last updated March 23, 2002.