How to Fold a Pentagon (All 26 Steps)
Version 3 -- Maximum Size, Almost Exact

Finished Pentagon

A traditional shape, as diagrammed by Jasper.
This is an intermediate method for folding a pentagon;
it takes 4 to 8 minutes to make.

The pentagon is used in many modular designs, as well as the cherry blossom.
This method makes the largest possible pentagon from a square:
A six inch (15 cm) square makes a pentagon with sides 3.6 inches (9 cm) long.
The instructions are quite detailed.
If they give you any difficulty, please let me know.


An Outline of the Diagrams:


The Diagrams:

Diagrams for steps 1-4.
  1. Start with a square, white side up.
    Valley fold in half; crease the entire fold.
  2. Valley fold the near layer in half; only crease near the top edge.
  3. Valley fold from point-to-point.
    The fold runs from edge of the paper (at the pinch made in step 2)
    to the bottom left corner. Only crease the top third of the fold.
  4. Like so. Unfold completely.
Diagrams for steps 5-8.
  1. Valley fold diagonally. Only crease the top third. Unfold.
  2. Valley fold the right edge to meet the intersection of the creases
    made in steps 3 and 5. Only crease at the top edge of the paper.
  3. Like so. Turn over from side-to-side.
  4. Pinch in half. (Only on the near layer, at the top edge.)
Diagrams for steps 9-12.
  1. Unfold to the original square, white side up.
  2. Valley fold the right edge to the crease made in Step 8.
    (Only crease the top edge of the paper.)
  3. Pinch in half. (Only on the near layer, at the top edge.)
  4. Unfold to the original square, white side up.
Diagrams for steps 13-17.
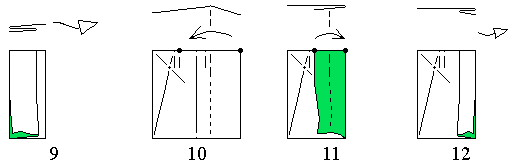
  1. From now on, crease the entire length of every fold.
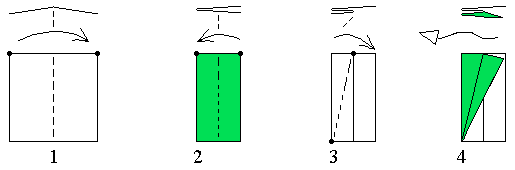
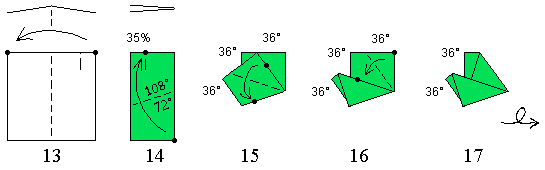
    Valley fold in half,
    so that the pinch made in Step 11 is in the near layer.
  2. Valley fold the folded lower corner to exactly meet the pinch made in Step 11.
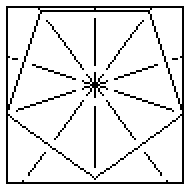
    Note:  If folded exactly, the pinch made in Step 11 is exactly 35 percent of the way
           in from the open edge of the paper. (35 percent is a little more than one-third.)
           This means that all 10 central angles of the pentagon will be almost exactly 36 degrees,
           causing the pentagon to be almost perfectly regular.
           Here is the math:
           1 - 2 * sin(36 deg.) / (1+ cos(36 deg.) ) = 0.35016
           On a 6 inch square, the error is less than one-quarter of the thickness of the paper.
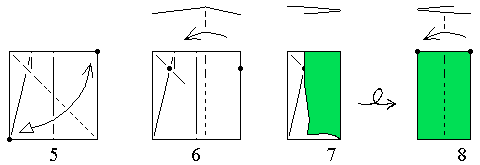
  3. Valley fold the new flap in half.
  4. Valley fold, so that the main diagonal lines up with the new edge.
  5. Like so. Turn over from side-to-side.
Diagrams for steps 18-22.
  1. Valley fold in half.
  2. Unfold to Step 18.
  3. Turn over from side-to-side.
  4. Unfold one flap from the bottom.
  5. On the near flap only, valley fold the short open edge
    to match the bottom folded edge of the flap.
Diagrams for steps 23-26.
  1. Like so. Note that all the folded edges line up.
    Turn over from side-to-side.
  2. Valley fold the remaining layers along the crease made in step 22.
  3. Like so. Note that all the folded edges line up.
    Unfold completely.
  4. The finished pentagon. Optionally, you can cut out the pentagon with scissors.
    The pentagon is used in the cherry blossom and many modular designs.

Navigational Assistance:


[ Home page | Origami Menagerie | Instructions | Comments | Cherry Blossom ]

The pentagon is a traditional shape. The folding method was developed by
Bennett Arnstein and Jasper in 1999. Diagrammed by Jasper in 1999.
Copyright 1995-99 by Jasper (aka John Paulsen). Your comments are welcomed.
Last updated July 23, 1999.