Folding Diagrams for Jasper's Box
p. 3 of 3 (Steps 24-29)


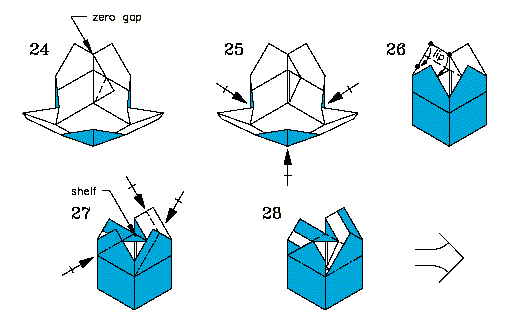
Diagrams for steps 24-28.
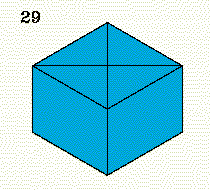
Step 29: The Finished Box.
  1. There is a 135 degree angle formed by the edge of the interior flap, and the top edge of the box (precreased in step 17.) Lock the interior flap by bisecting this angle.
    Note: If the flap cannot be locked by bisection, lock the flap by folding it over twice.
    Avoid raising any paper above the horizontal crease made in step 17.
  2. Repeat steps 22-24 on the other three interior flaps.
  3. Make a "shelf" by valley folding the lip of one side of the flap. The lower part of the lip (the triangular shelf) will lie parallel to the base of the model.
  4. Repeat step 26 on the other three sides.
  5. Interlock the four flaps.
  6. The finished box.
    The box can be opened and closed fairly easily.

    Note: At step 11, you choose the dimensions of the final box.
    The distance between the bottom valley fold and the bottom edge is one-half the box' height.
    The distance along the valley fold between intersections with the "X" is the length of the box' base.

    Note: To make a cube, fold the bottom up to the mid-line.

Navigational Assistance:


[ Home page | Origami Menagerie | Instructions | Comments | Steps 13-23 ]

Format copyright 1996-99; model copyright 1996 by Jasper (aka John Paulsen). Your comments are welcomed.
Last updated July 23, 1999.